
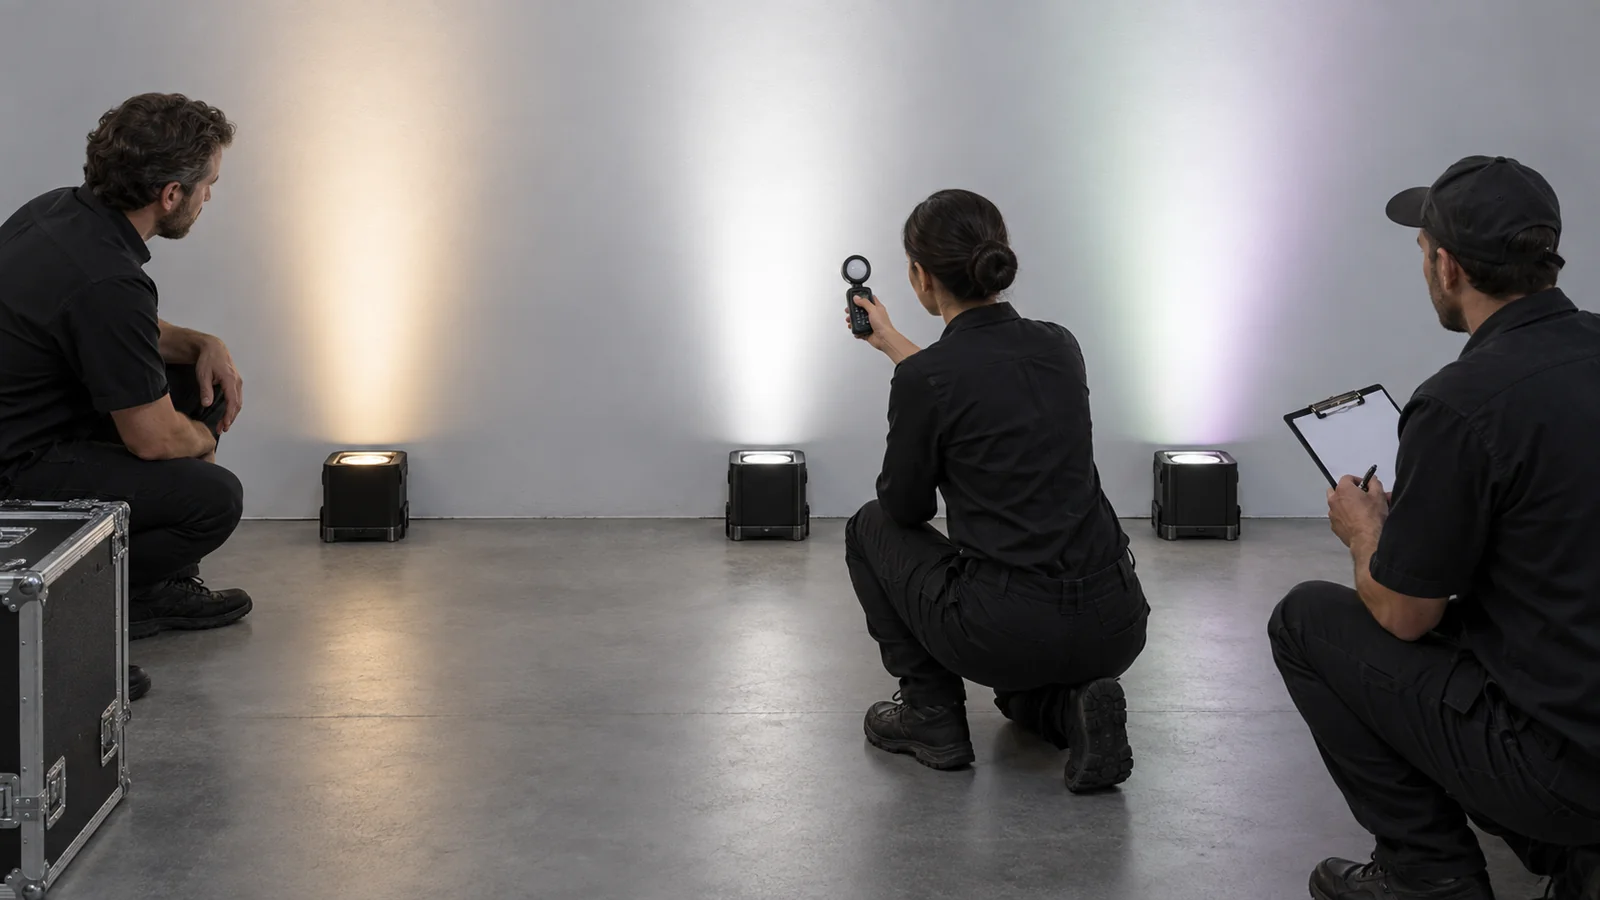
A mixed-brand uplight fleet can look uniform on the control screen and uneven across a ballroom. One column appears green, another pink; white drape changes character as guests move between lighting zones. Copying a preset or dimmer percentage rarely resolves the whole problem.
For production, rental and venue teams, the useful deliverable is a repeatable scene with documented limits. Start with an approved reference, separate white-point correction from color rendering, and keep the measurement setup fixed while making adjustments.
Quick Answer
To match white light across battery uplight brands, choose one reference fixture and scene. Set each unit to the same measured CCT, compare them at the same illuminance, then correct visible green–magenta tint with each fixture’s available controls. Do not copy DMX values between brands; verify the result on the actual venue surface, people, fabric or camera.
Key Takeaways
- Approve the reference fixture and scene before adjusting the fleet.
- Match measured CCT, Duv and illuminance; evaluate rendering separately.
- Use each model’s documented controls and save its individual settings.
- Recheck the actual surfaces, dimming levels and camera workflow.
- Define acceptance tolerances for the project and retain the test conditions.
What Matching White Light Actually Means
Matching has three layers: the white point, the amount and distribution of light, and the appearance of illuminated objects. Passing one layer does not establish the others.
CCT describes the warm-to-cool position of white light. Duv describes its signed distance from the Planckian locus: at a comparable CCT, a more positive Duv commonly appears greener and a more negative value pinker. The visual effect also depends on adaptation and surroundings. A fixture’s displayed CCT is a command, so compare measured output.
CRI, R9, TLCI and TM-30 describe rendering behavior. They cannot tell the operator which tint correction to apply. Sources with similar white points can have different spectra and make colored objects look different. The DOE-hosted TM-30 tutorial distinguishes source chromaticity from the rendition of illuminated surfaces.
Swipe horizontally to compare the metrics and their uses.
| Measure | Role in a matching test | What it cannot establish |
|---|---|---|
| CCT | Align the warm/cool position | Green–magenta agreement or object rendering |
| Duv | Compare tint offset at similar CCT | Complete spectral or rendering agreement |
| Illuminance | Equalize incident light at a marked point | Equal beam shape or perceived surface brightness |
| CRI Ra and R9 | Review general fidelity and the separate strong-red result | A white-point correction recipe |
| TLCI | Assess a modeled television imaging chain | Every camera’s response or temporal flicker |
| TM-30 | Review fidelity, gamut and hue-specific shifts | White-point agreement or illuminance |
Use the CRI, R9, TLCI and TM-30 guide for metric definitions and report interpretation. Here, the priority is turning those distinctions into a field procedure.
Why the Same CCT or DMX Value Looks Different
Different fixtures can use different emitters, white channels, calibration, optics and control mappings. A nominal white preset may select a different spectral mixture on each model. Even channel names need checking; the RGBW, RGBWW and RGBWA+UV comparison explains the architecture questions to resolve first.
DMX values are control commands, not cross-brand color standards. A dimmer value also depends on the fixture’s response curve and available output. The DMX color-consistency guide covers this background; cross-brand matching requires separate settings tied to measured results.
ETC’s calibration guidance explains how its calibrated modes compensate for emitter differences, while direct emitter control has different matching limitations. That principle supports checking operating mode; it does not establish compatibility between other manufacturers.
Choose a Reference Fixture, Surface and Scene
Select a fixture that represents an approved look and the operating range needed for the job. Identify that physical unit by asset or serial number. Do not automatically choose the newest or brightest fixture: every comparison unit must reach the intended scene within its usable controls and output.
Build a test area with a matte neutral surface and representative production materials. Mark fixture positions, aiming, target area and meter position. Establish the venue scene to approve, including house lighting, viewing positions and cameras.
Agree acceptance criteria before adjusting anything. Include measured white-point and illuminance limits, acceptable visible differences, critical subjects and who signs off. Set tolerances per project, considering instrument uncertainty and repeatability. There is no universal threshold suitable for every ballroom, stage and camera production.
A Repeatable Six-Step Matching Workflow
1. Lock the physical setup
Keep throw distance, height, tilt, surface and sensor orientation fixed. Compare fixtures one at a time at the same marked position to prevent overlapping beams from contaminating readings. Then check them side by side in the intended layout.
Fit the intended optics and diffusers. Use comparable coverage, but record differences rather than assuming two beam labels are equivalent. Check both the center and relevant edges of the lit area.
2. Standardize the operating state
Record firmware, control personality, calibration mode, dimming curve, battery state and power source. Follow each manufacturer’s stabilization procedure. Hold ambient conditions and house lighting steady during measurement.
Use the intended battery operating mode. A match established under one power or thermal condition needs verification under the conditions of the event. Disable automatic effects or adjustments that interfere with a static comparison.
3. Set the target CCT
Measure the approved reference with a suitable, calibrated color-measurement instrument. Set the other fixture near the target, then adjust using its documented white controls. Record displayed settings and measured results separately.
Repeat for the warm, neutral and cool scenes the project actually requires. A successful match at one white point does not validate the whole tuning range.
4. Match illuminance
Measure illuminance at the same marked point and orientation, with each fixture isolated. Adjust output until the comparison reaches the agreed target. Do not compare equal dimmer percentages or meter the beam center of one fixture against the edge of another.
If a unit cannot reach the target, review the common operating level or fixture allocation. Recheck white point after dimming, then assess coverage across the working area.
5. Diagnose and correct tint
Compare Duv and the neutral surface against the reference. Adjust tint or green–magenta balance where the fixture provides the control. Confirm the manufacturer’s direction and scale; matching slider positions has no cross-brand meaning.
If only individual emitter controls are available, make small documented changes and remeasure CCT, Duv and illuminance. These variables can move together. Recheck rendering after changing the mix. If the fixture cannot reach the approved result, record the limitation and separate its deployment zone.
6. Verify the real scene and record settings
Restore the intended venue lighting. Inspect walls, white fabric, several skin tones, flowers and scenic surfaces from working viewpoints. Evaluate beam overlap and low-output scenes as well as the main look.
Record camera footage with fixed exposure, white balance and processing settings. Repeat critical checks after representative operating time on battery. Save the approved configuration with fixture identity and test conditions so another technician can reproduce it.
How to Diagnose Green or Magenta Tint
Start by swapping fixture positions without changing settings. If the difference follows the fixture, investigate its output or configuration. If it stays on the same wall patch, check paint, ambient spill and geometry. Change one variable at a time.
Swipe horizontally to compare symptoms, possible causes and checks.
| Symptom | Likely cause to investigate | Next check |
|---|---|---|
| Similar CCT, but one wash looks green or pink | Different Duv or ambient contamination | Isolate each light; measure Duv at the same point |
| Center matches but edges differ | Optical mixing, diffuser or aiming differences | Compare beam distribution and approved accessories |
| Neutral target matches but flowers differ | Different spectral rendering | Review spectral reports and test the actual flowers |
| Match changes when dimmed | Mode-dependent emitter balance or control behavior | Measure at each required operating level |
| Difference appears mainly on camera | Camera spectral response or processing | Lock the imaging chain and compare recorded clips |
| Difference stays at one location | Surface reflectance or another light source | Swap positions and isolate ambient contributions |
Colored fringes or shadows need an optical check before a global tint adjustment. The LED colored-shadows and optical-mixing guide explains why a surface can show local color separation even when a central reading looks acceptable.
Match for Weddings, Fixed Venues and Cameras
For weddings, inspect the actual dress fabric, table linen, flowers and skin under the approved scene. Include the transition between adjacent washes: isolated patches can conceal a difference that becomes obvious on continuous drape. Agree the result with the production and imaging teams before guests arrive.
For fixed venues, establish repeatable scene records for the rooms and house-light settings in use. Keep a reference unit available for replacement checks. Revalidate changes in firmware, optics or scenic materials before reusing old settings.
For cameras, use the real camera bodies, profiles, white balance, shutter settings and monitoring path. A global white-balance change affects the entire frame; it cannot independently correct several mismatched lighting zones. EBU R 137 provides a television-lighting assessment framework. Treat TLCI as supporting evidence, then test the production cameras. Check temporal flicker separately.
Housing finish is a separate visual decision. A white or black enclosure does not determine emitted CCT, Duv or CRI. Use the white-versus-black battery-uplight guide to assess how equipment fits the scenery.
Build a Cross-Brand Fixture Record
Store an approved record with the show file and fleet documentation. Include:
- Fixture model, asset ID, serial number, firmware and control personality.
- Reference unit, target CCT, measured CCT/Duv and illuminance.
- Channel values, white mode, tint setting where available, and dimming curve.
- Optics, diffuser, geometry, surface and ambient-light conditions.
- Battery state, power mode, stabilization and elapsed operating time.
- Instrument identity, calibration status, measurement method and uncertainty.
- Camera settings, clips, approved materials, tolerances, reviewer and date.
Keep separate entries for each approved scene and operating level. Settings without these conditions are difficult to reproduce. Mark limitations clearly, including units suitable for separate zones but unsuitable beside the reference on continuous surfaces.
What Not to Do
Do not correct a perceived brightness difference by changing tint before measuring illuminance. Do not use an automatic phone photograph as a colorimetric report, or treat a nominal CCT label as a measurement. Avoid changing white balance between comparison shots.
Do not infer rendering quality from emitter count, housing color or a generic catalog score. Keep measurements traceable to the tested model and configuration. A match on one surface or one sample does not establish fleet-wide equivalence.
Approve the Fleet Before Buying More
Test representative samples against the existing reference at the required scenes, dimmer levels and battery conditions. Include proposed accessories and replacement units. Ask the supplier for model-specific spectral reports and supported adjustment methods, then retain the approved configuration with the purchasing specification.
Where a mismatch remains, decide whether separate zones are operationally acceptable. This workflow does not establish that any LumiUp model matches Astera or another brand; that requires evidence for the exact fixtures and conditions.
Frequently Asked Questions
Can different battery uplight brands produce matching white light?
They may reach an acceptable match within a defined scene and operating range. Verify measured white point, illuminance, surfaces and camera footage. Do not assume equivalence across every setting or fixture in the fleet.
Why do two fixtures at the same CCT look different?
They may differ in Duv, output, spectrum, optics or surrounding light. Start with isolated measurements at the same geometry and illuminance, then compare neutral and colored surfaces.
Can I copy DMX values between brands?
No. Channel mappings, emitter mixtures, calibration and dimming responses can differ. Save separate values for each model and approved scene, linked to measured results and operating conditions.
Does a higher CRI fix green tint?
No. CRI describes color-rendering fidelity, while Duv helps diagnose white-point tint. Correct the white point using available controls, then reassess rendering on the subjects that matter.
What if a fixture has no tint control?
Check its documented white modes and supported emitter controls. Any manual mix needs remeasurement and scene testing. If the approved result remains unreachable, use another fixture or allocate a separate lighting zone.
Should I compare fixtures at the same dimmer percentage?
No. Compare measured illuminance at the same point and geometry. Equal percentages can produce different output, and dimming can also change the white point or spectral mixture.
What tolerance should I use for cross-brand matching?
Define tolerance for the specific project, reference scene, surfaces and cameras. Account for instrument uncertainty and repeatability, and document who approves the result. No universal acceptance limit covers every application.
Does a white housing produce better white light?
No. Housing color concerns the visible enclosure. Emitted CCT, Duv and rendering depend on the light engine and operating configuration, which need their own evidence and tests.
Conclusion: Review the Sample and Configuration
An approved mixed-brand scene needs measured settings, real-material checks and a record another technician can repeat. Contact LumiUp for a sample or configuration review with your reference fixture, required white scenes, venue materials, cameras and acceptance criteria. Request evidence for the proposed configuration before expanding the fleet.