
Quick answer
Warm white battery pinspots are a practical choice when you want to highlight wedding centerpieces, cakes and selected decorations without running a power cable to each light. Choose the fixture by the size of the object, the available mounting position, the beam angle and the time it must stay on. If you only need warm white, a dedicated white-light fixture may meet the brief with simpler operation.
For rental companies, wedding venues and event teams, the useful starting point is a list of objects to illuminate. That list helps you choose a suitable light and build a kit the crew can set up consistently.
Choose the fixture for the job
A request for a “warm white cordless lamp” can describe several different jobs. Someone may want a lamp on each dining table, a wash of light up the venue walls, or a small spotlight aimed at the flowers. Clarify the intended result before comparing wattage or battery capacity.
Swipe horizontally to compare lighting tasks.
| Lighting task | Fixture to consider | What to assess |
|---|---|---|
| Highlight a centerpiece, cake or display | Battery pinspot | Beam size at the object and a suitable aiming position |
| Light a wall, column or backdrop | Battery uplight or wash fixture | Coverage across the surface and spacing between fixtures |
| Provide light directly on a dining table | Cordless table lamp | Light distribution across the table and comfort for seated guests |
Pinspotting directs attention to a small part of the scene. It can give a floral arrangement a clear presence while the room lighting stays low. A large backdrop or a whole dining table usually calls for broader coverage. Where several jobs are involved, plan each separately and choose the appropriate fixtures for them.
For a wider comparison of compact fixture types, see our mini battery uplight buying guide.
Match the beam to the decoration
Measure the decoration and the distance from the proposed light position to it. A tall arrangement may need light across both its upper flowers and lower foliage. A cake may need an even view of its front and sides. Start with the visible area you want to cover, then check whether one beam can reach it.
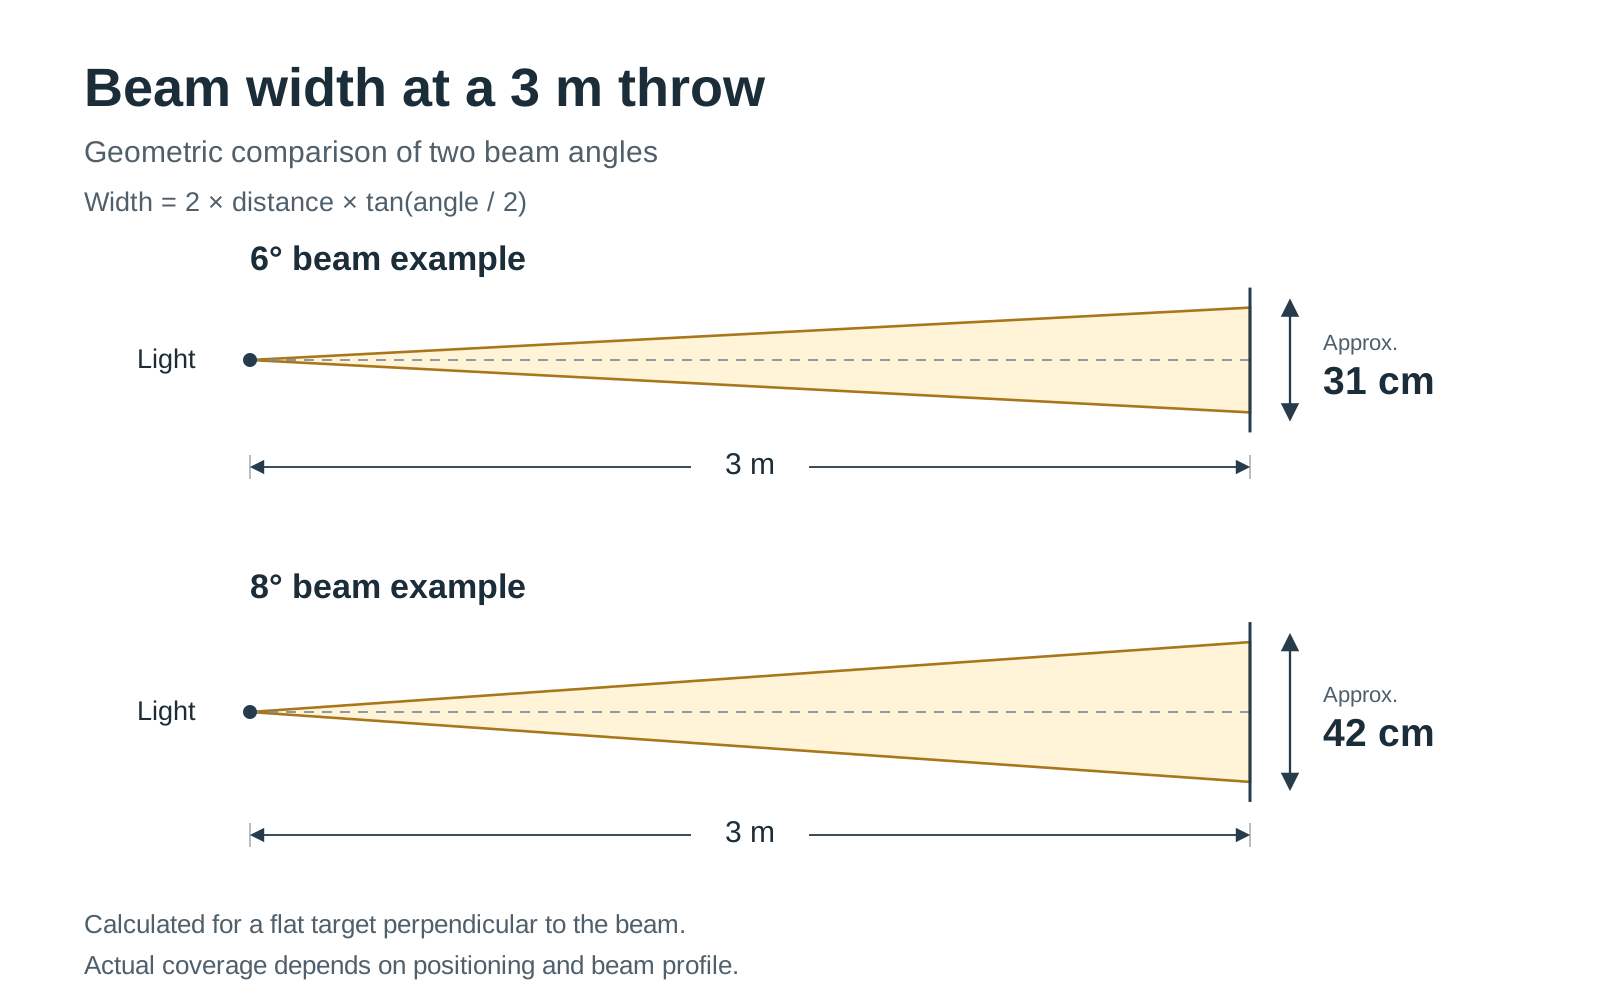
For a circular beam aimed squarely at a flat surface, its nominal width can be estimated from the throw distance and full beam angle. The calculated examples below show how quickly the size changes.
Swipe horizontally to compare the separate 6° and 8° examples.
| Throw distance | Width at 6 degrees | Width at 8 degrees |
|---|---|---|
| 2 m | About 21 cm | About 28 cm |
| 3 m | About 31 cm | About 42 cm |
| 4 m | About 42 cm | About 56 cm |
These are geometric planning values for a flat target perpendicular to the beam. Angled surfaces and three-dimensional objects need a placement test. A wider calculated footprint also says nothing about how bright the object will look.
The IES definition of beam angle uses the directions where luminous intensity falls to half its maximum. Light can extend beyond that nominal beam. Look at the actual edge, spill and brightness on the decoration before approving the setup.
At a 3 m throw, a 6° beam is approximately 31 cm wide. A 30 cm arrangement leaves little room for aiming adjustments, and foliage may still shadow lower flowers. Check the whole decoration before accepting the coverage. An 80 cm arrangement requires a different plan. Consider a fixture with a wider optic or additional aiming positions, and check how the beams overlap.
Position the light around guests and décor
Assess each proposed position from both the fixture and the guest side. The path between light and decoration should remain clear when guests are seated and staff are serving. A position that works in an empty room may be blocked by people, chairs or a tall centerpiece once dinner starts.
For table flowers, aim at the main visible surfaces and inspect the result from several seats. With a cake, agree which sides need to look good for guests and photography. If one light leaves an unwanted dark side, try another angle or a second source before increasing brightness.
Keep the emitting lens out of normal seated sightlines where practical. Test reflective vases, metallic ornaments and glossy icing, because a position that illuminates the object can also create an uncomfortable bright reflection. Small changes in position and aim may improve the result.
Check installation options with the venue before ordering the kit. A magnetic base needs a suitable ferromagnetic surface; it will not attach to timber or aluminum. For elevated installation, have a competent installer confirm that the fixture and attachment method are suitable, including any required secondary retention.
Specify the warm white you want
Ask for the intended color temperature and, where appearance matters, compare a sample beside the venue’s existing lights. A 2700K reference gives the supplier a clearer starting point than “warm white” alone. If the client wants a different appearance, agree that requirement before ordering a batch.
Color temperature describes the appearance of the light itself. Color rendering concerns how illuminated objects look. PNNL researcher Michael Royer’s tutorial on color rendition explains why these are separate considerations. A Kelvin value alone cannot tell you how flowers, food or skin will appear.
For a sample check, use representative flowers, white fabric and the cake finish or a similar material. View them at the planned brightness and in the room’s ambient lighting. If photography is part of the brief, involve the photographer and check the intended camera settings.
When combining brands or production batches, compare the fixtures together. Our guide to matching white light across battery uplight brands explains how to assess differences in tint, brightness and white appearance.
When you only need warm white
Separate two buying requirements: a light that will only be used in a warm white scene, and a fixture built with a dedicated warm white source. A color-changing fixture may be useful when the same inventory also serves themed events. A dedicated warm white fixture may suit a kit reserved for consistent accent lighting.
Compare beam shape, white appearance, control and runtime for the actual task. An amber channel is a colored light source and does not by itself establish the performance of a dedicated warm white LED. For more detail, see RGBW vs RGBWW vs RGBWA+UV battery lights.
Plan control and runtime for the full event
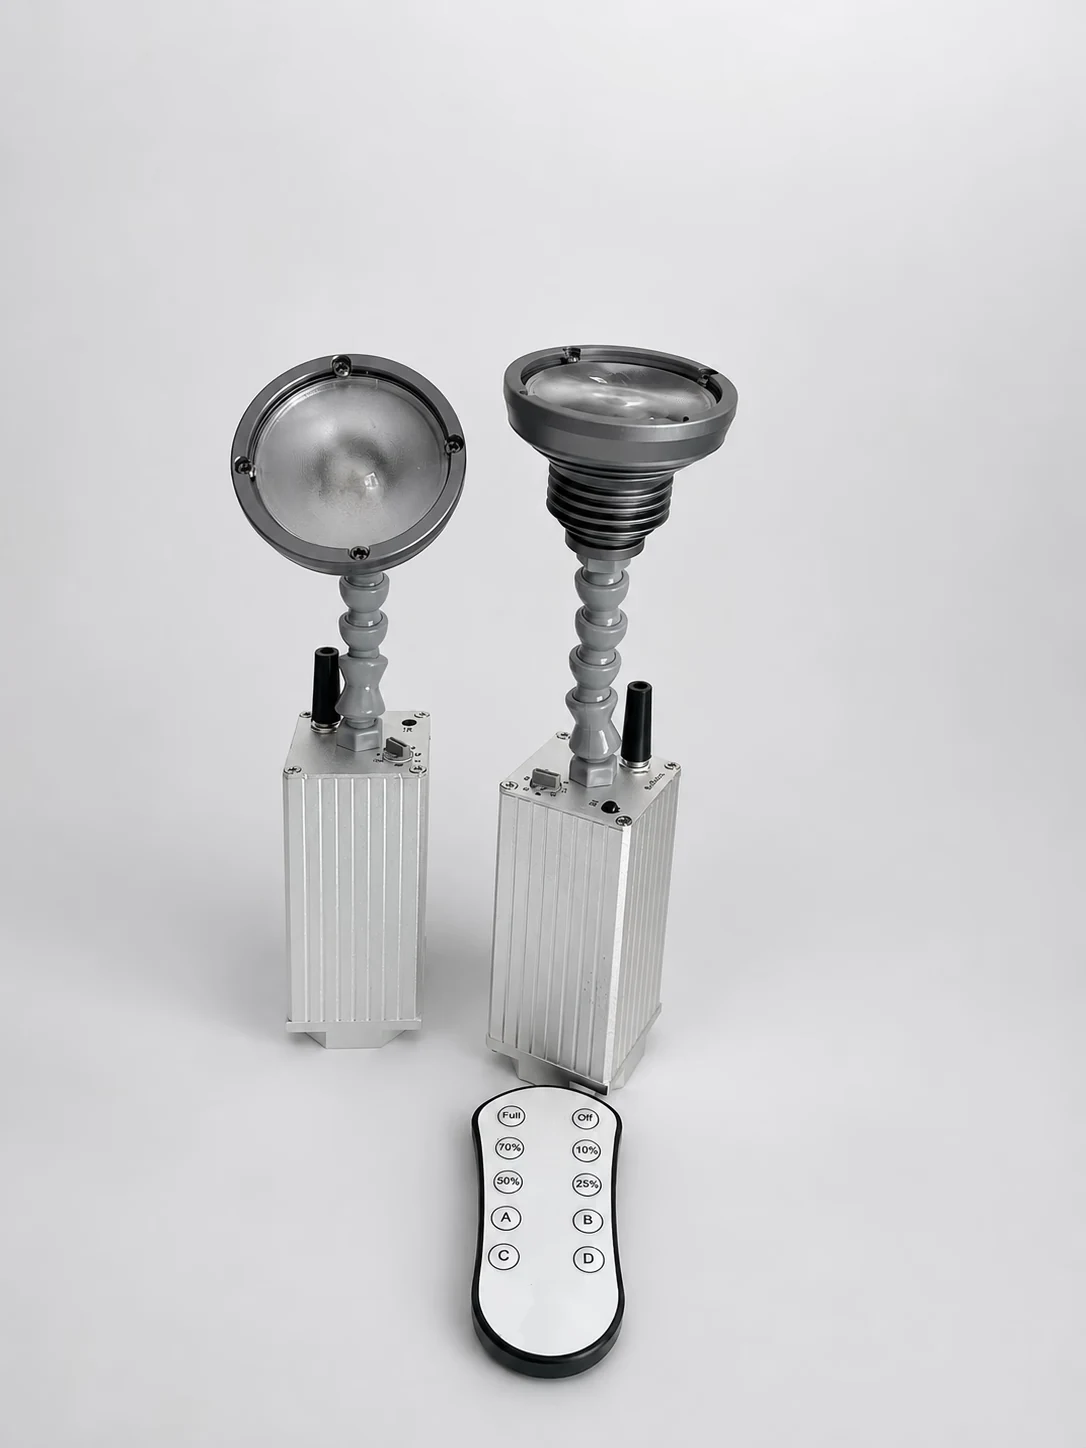
Battery operation describes the power supply. Remote control describes how you send commands. Confirm both for the exact model, including whether the crew can adjust it after it has been positioned.
With an infrared remote, plan a clear aiming path to the receiver. Test control from the places the operator can actually reach during the event. For a static warm white setup, identify who will set the brightness, who can change it during service and when the lights will be switched off.
Check low-level dimming during the sample evaluation. Look for a usable brightness setting, a steady appearance and consistent output across the kit. Test video at the intended dimmer level when filming matters; a smooth-looking light to the eye does not establish its performance under every camera setting.
Build the runtime requirement from the first switch-on to the final switch-off. A six-hour reception needs eight hours of operation if the lights are turned on two hours before guests arrive. Allow a practical reserve for delays and test the planned settings on representative batteries.
Compare runtime at the brightness you intend to use. A figure measured at reduced output is not interchangeable with a full-output runtime. Our battery uplight runtime guide explains what to check when planning an event schedule.
Build a practical pinspot kit
Count the targets, then the fixtures needed at each one. Begin with one proposed light for each small target, then add lights where a large object, an obstruction or the desired viewing angles require them. Confirm the quantity through a representative setup before fixing the purchase order.
For example, 12 small centerpieces and one cake give you 13 targets. If each centerpiece uses one fixture and the cake needs two fixtures aimed from different directions, the plan requires 14 working pinspots before spares. The final quantity depends on the decorations, room layout and coverage confirmed during a sample setup. Add working spares according to how quickly a failed or depleted fixture could be replaced.
Use a simple position list so the crew knows which light belongs to each target. Record any special aiming or brightness instructions after the setup is approved. This is particularly useful when a venue repeats the same table layout or a rental team prepares the kit in advance.
Check transport fit and charging compatibility for the exact fixture. Protect adjustable parts, keep chargers identifiable and plan enough charging positions for the interval between bookings. A case that carries the required number of lights still needs the correct internal fit and electrical arrangement if it also charges them.
Before a bulk order, ask for a quotation that identifies the color-temperature configuration, included controls, chargers and packing arrangement. Agree how the sample will be evaluated and record the accepted setup so a later order can be compared against it. This gives both the supplier and the rental team a clear description of what the kit must deliver.
A warm white option from LumiUp
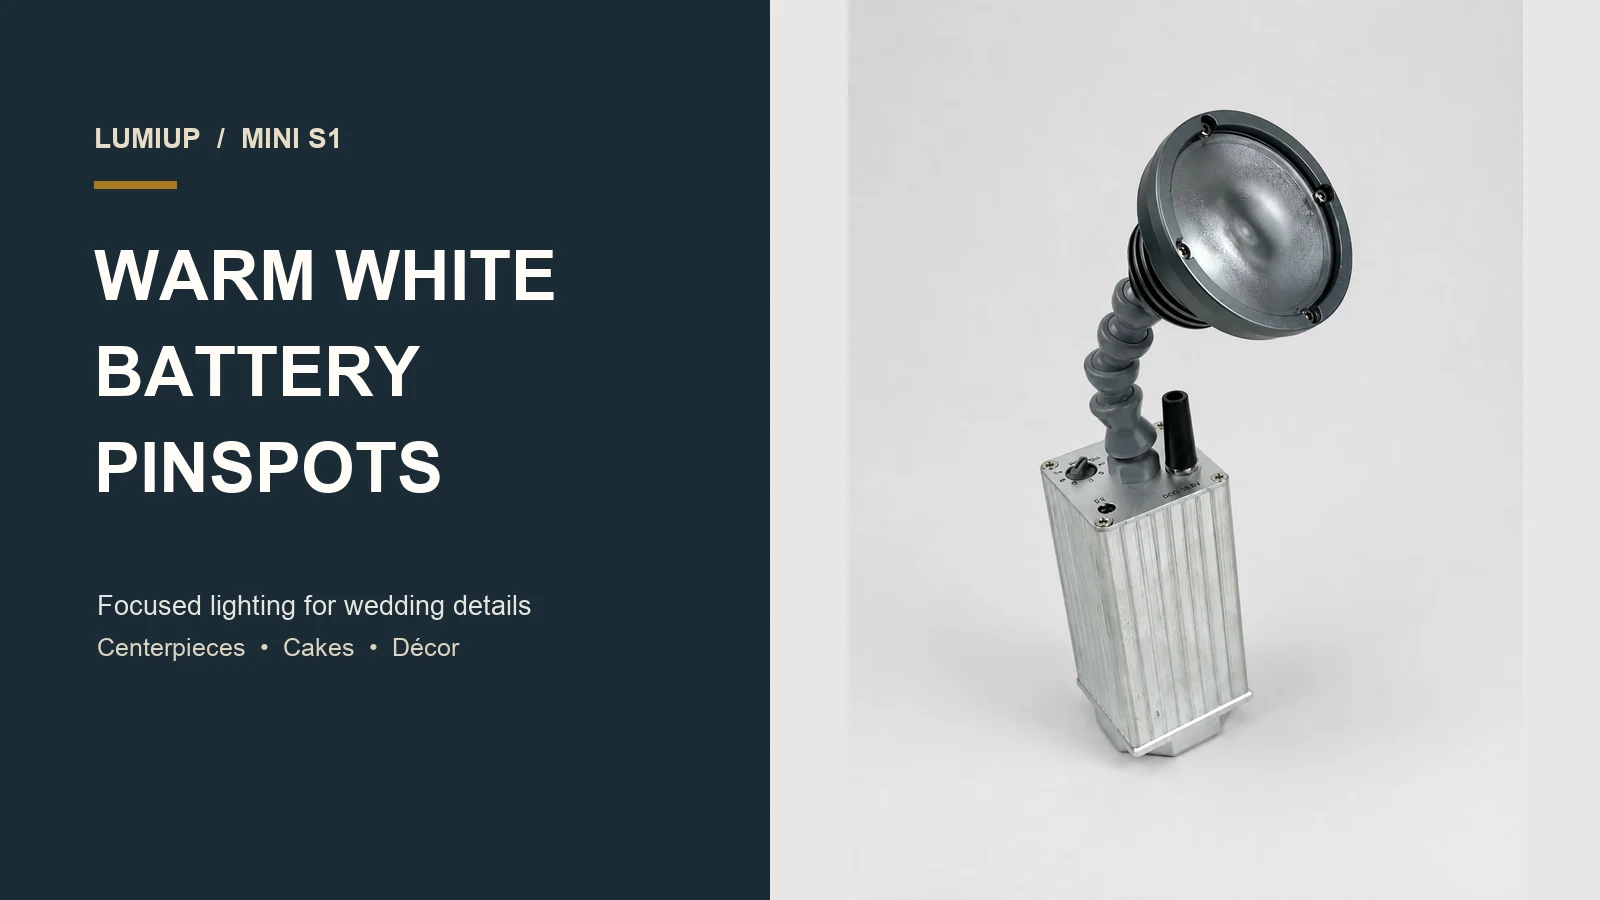
The LumiUp Mini S1 is a rechargeable pinspot with a 10W LED, standard 2700K output and a specified 6–8° beam. The head angle adjusts for aiming; the fixture does not have manual zoom. It has a magnetic base and infrared remote control.
Its stated runtime is approximately 10 hours at 100% brightness, with charging taking about four hours. This IP22 model is intended for dry indoor accent lighting. Custom color temperatures can be specified for a project; confirm the configuration when ordering.
Use its focused beam for small decorative targets, and assess it at your planned working distance. For broader coverage or other compact fixture formats, compare the options in the LumiUp battery lighting range.
Frequently Asked Questions
Can a warm white pinspot light the whole dining table?
A narrow pinspot concentrates light on a selected object. Choose a table lamp or a broader lighting arrangement when the brief includes menus, place settings or general illumination across the table.
Can an RGBWA+UV light serve the same purpose?
It may, if its white appearance, beam, control and runtime suit the task. Compare a sample at the actual working distance. The color-channel label alone does not establish whether it can replace the proposed pinspot.
Does Mini S1 allow color temperature adjustment during use?
Mini S1 has standard 2700K output with project-specific CCT options available to order. Choose the required color temperature when ordering; these options do not provide an adjustable CCT range on one fixture.
Can the beam be zoomed to fit a larger decoration?
Do not assume that a stated beam-angle range means adjustable zoom. Mini S1 is specified at 6–8° without a manual zoom function. Choose a fixture and lighting arrangement that fit the target size.
How many pinspots does a wedding need?
Count the objects and aiming positions, then check coverage in a sample layout. Large decorations or objects viewed from several sides may need additional lights. Include spares based on the event’s operating plan.
What should be checked before buying a full kit?
Confirm the beam at the intended distance, the warm white appearance on real decorations, dimming, control access, mounting suitability and runtime at the planned brightness. Also check the charging and transport arrangement.
Plan your wedding pinspot setup
Send us the objects you want to illuminate, approximate working distances, proposed fixture positions, required operating time and quantity. Include a reference for the desired warm white appearance if you have one.
Discuss your requirements with LumiUp to select a suitable fixture and confirm the configuration for your event or rental inventory.